Passover Preparations

I am busy deciding what to prepare for the main dish and dessert for Passover, since most of the other items on the menu are the expected traditional fare. I am considering the following:

Roasted Poussins with Pomegranate Sauce

Chicken Tagine with Apricots and Spiced Pinenuts (from my friend Chef Farid Zadi)

Patatine e Carciofi Arrosto (Roasted Potatoes and Artichokes)

Torta del Re

Nottingham Nut Cake

Lemon, Creme Fraiche and Chestnut Cake (for a dairy meal)

Damp Apple and Almond Cake

Castagnaccio

For more ideas, click here. I will post my menu in a couple of weeks.

Chag Purim Sameach – Happy Purim!

My first post on this blog was during the holiday of Purim and here we are one year later making Hamantaschen again. I decided to make three of the four fillings I made last year: Cranberry-Orange, Date-Walnut and Apricot Lekvar.

My family did not have a tradition of making Hamantaschen for Purim. My German grandmother made Haman’s Ears, which was dough that was rolled out and cut into strips, fried in oil and dusted with powdered sugar. I only started making this biscuits about 12 years ago when the little old lady that used to make them for our synagogue developed dementia and couldn’t make them anymore. She was not a member of our congregation, and so we used to drive 60 miles to Birmingham to buy them from her to serve at our congregation’s Purim party. One of the congregants went to pick up the 10 dozen Hamantaschen she had ordered and the little old lady didn’ t know why she was there and hadn’t made any biscuits. So, I received a frantic phone call asking if I could make them. I said I had never tried, but how hard could they be? I found a recipe and I have been making them ever since.

This year, I wanted to make another cookie in addition to the Hamantaschen because I had to make gifts to give to our landlords, who live about 100 yards away, and our new neighbors. It is Jewish law that on Purim one must send at least one Mishloach Manot (sending gifts of food) to a friend and also send Matanot La’evyonim (gifts to the poor). You are suppose to give two different types of ready-to-eat food, each of which require a different blessing. So, you can give two different cakes or biscuits or fruits, etc or mix them up.

I was looking at an Italian blog and found a link to a recipe for biscuits that are from the Jewish Ghetto in Venice. A friend of mine who is from Venice told me that he remembers going to a bakery in the Ghetto and buying these biscuits. They are called Impade and they are filled with an almond filling and rolled in icing sugar (confectioner’s sugar). Have a look at the link below for more pictures on how to make the cookies. If you speak Italian, then you can read the entire recipe. Here is a loose translation (I did a few things differently):

Impade
Venetian Jewish Almond Cookies
Ingredients
Pastry:
  • 500 g all purpose flour
  • 275 g sugar
  • 3 small or medium eggs
  • 125 ml corn oil
Filling:
  • 250 g whole blanched almonds
  • 200 g sugar
  • 2 eggs
  • Zest of one lemon
Instructions
  1. Impade Dough
  2. Mix the sugar and the flour together and create a well. Add the eggs and the oil and bring the flour-sugar mixture from the sides into the egg-oil mixture. Mix until you create a ball, similar to pie dough. It should be soft and elastic. Set aside and prepare the filling.
  3. Impade Almond Filling
  4. Grind the almonds and place in bowl. Add the sugar, lemon zest, the eggs and mix well.
  5. Preheat the oven to 200C (400F).
  6. Rolled dough
  7. Take 1/3 of the dough and roll into a 2cm (4/5 inch) diameter snake. Cut the snake into 5cm (2 inch) pieces and roll each one flat into a rectangle.
  8. Rolled out and filled
  9. Put one teaspoon of almond filling in the middle of the rectangle and bring the long sides together over the filling and pinch together into a crest.
  10. Impade Prebaked
  11. Then shape the dough into the shape of the letter "S".
  12. Impade
  13. Bake the biscuits at 200C (400F) for 5 minutes and then reduce the temperature to 180C (350F) for an additional 15 minutes.
  14. Roll them immediately in icing sugar (confectioner's sugar) and let them cool.

Orange You Glad It is Almost Spring?

I am finally seeing light at the end of the tunnel. We have been unpacking like crazy, but we still have a little more to do. However, I did find time to take some pictures around my new village and make a cake for a friend’s birthday party on Saturday night.

Spring is rearing its beautiful bounty here in Israel. Here are a few pictures near my new home:

I really love my new house. It is so nice to have a garden. I can’t wait to take advantage of it. The citrus trees are in full bloom, so when a friend of mine asked me to bring something for her birthday party on Saturday night, I decided to make something citrusy. She said she wanted something with orange in it, so I made an orange curd cake. This is a variation of a Serena Bass recipe I have for her lemon curd cake. I added less sugar and I also added a little lemon juice to offset the sweetness of the oranges. It is an easy cake recipe and the curd can be prepared several days in advance. This is a very moist cake that will be a big hit at any meal or afternoon tea.

Orange Curd Cake
Ingredients
For the orange curd:
  • 1/4 cup sugar
  • Pinch of kosher salt
  • Zest of 3 oranges finely grated
  • 1/2 cup orange juice
  • Juice of 1 lemon
  • 4 extra-large egg yolks
  • 2 extra-large whole eggs
  • 100 g 7 tablespoons unsalted butter, room temperature
For the cake:
  • 1 1/2 cups all-purpose flour
  • 1 1/2 teaspoons baking powder
  • 3/4 teaspoon kosher salt
  • 170 g 1 1/2 sticks unsalted butter, room temperature
  • 1-1 /2 cups sugar
  • 3 extra-large eggs
  • 3 tablespoons finely grated orange zest
Instructions
  1. Orange Curd
For the orange curd:
  1. In a medium-size nonstick or nonreactive saucepan, add the sugar, salt, and orange zest and juice, and whisk until smooth. Then add the egg yolks and whole eggs and quickly whisk well. Set over medium-low heat and cook, stirring pretty much constantly until the mixture starts to bubble around the edges (about 8 minutes). Then add the butter in little lumps, stirring after each addition, and simmer gently. (No boiling, as the molten mixture can cause quite a burn if it splats onto your hand.) Stir for about 5 minutes, until the mixture thickens well. Transfer it to a small shallow bowl and cover with plastic wrap pressed onto the surface while the mixture is still hot; set aside to cool. Once it's cool, you can use it immediately or transfer it to a plastic container, cover the surface as before, and store in the fridge for up to a week or in the freezer for up to 2 months.
For the cake:
  1. Position a rack in the middle of the oven and preheat to 350°F (175°C). Grease a 22cm (9-inch) springform pan with vegetable oil.
  2. Sift the flour, baking powder, and salt together and set aside. Using an electric mixer with the balloon whisk attachment, beat the butter until creamy and pale, about 5 minutes. Add the sugar and beat for 3 minutes. While the sugar is fluffing up, break the eggs into a bowl and whisk to blend. Gradually pour the eggs into the mixture and beat for another 2 minutes. Scrape the sides and base of the bowl a couple times to make sure everything is well incorporated.
  3. Remove the bowl from the mixer, stir in the orange zest, add the dry ingredients, and fold in gently until just a little flour is still visible.
  4. Spread half the cake batter on the bottom of the pan. Cover with half of the orange curd, keeping just shy of the perimeter. Spoon on the remaining batter somewhat randomly, then drop 3 large spoonfuls of the orange curd on top of the batter. Take a butter knife or blunt knife and make a figure eight motion in the batter to create a marbling effect.
  5. Bake for 45 to 50 minutes or until a toothpick inserted in the cake comes out clean and the lemon curd on top has turned a rich golden brown. If the curd is browning too much, lay a sheet of aluminum foil over the pan.
  6. Let the cake cool completely in the pan. Then run a small sharp knife around the circumference. Release and remove the sides of the springform. Run a large, sharp unserrated knife under the cake to loosen it. Then use the knife blade to help slide it onto a cake plate. You can either dust with confectioners' sugar or leave the cake plain so the orange curd shows.

Couscous Lesson

Several weeks ago Raizy, the daughter of a good friend of mine taught me and her mother how to make couscous. Raizy married into a Tunisian/Moroccan family and learned how to make couscous from her mother-in-law. I have wanted to learn how to make couscous ever since I bought Paula Wolfert’s Couscous and Other Good Food from Morocco. I love North African food and have always used instant couscous and always felt like I was cheating. I thought it would be too complicated to make, but after my lesson, it really isn’t that hard. It is a bit time consuming, but you can make it in advance and keep it in the freezer. My husband made a vegetable tagine and we used one of our two packages of couscous. It was delicious. I am saving the other one for when we move to our new home next month. Unfortunately, I forgot to take pictures of the vegetable couscous, but I promise I will feature the couscous in February.

Thank you Raizy and Miriam, I really enjoyed our “Girls Night Out”.

Raizy's Couscous
Ingredients
  • 1 kg 2.2lbs white semolina
  • 1 tablespoon salt
  • 1/3 cup canola or light olive oil
  • 5-1/4 cups water
Instructions
  1. Couscousier
  2. Fill 1/4 of the bottom of a couscousier with water and place on medium heat.
  3. Cornmeal Texture
  4. Place 1kg of semolina in a very large bowl.
  5. Oil and Mix
  6. Mix the salt into the oil and drizzle over the semolina.
  7. Cornmeal Texture
  8. Mix with a hand-held mixer until you get a cornmeal consistency.
  9. Thicker Cornmeal Consistency
  10. Slowly drizzle 1-1/4 cups of water to the semolina mixture and mix with a mixer until you get a thicker cornmeal mixer. Let the mixture rest for five minutes.
  11. Sifting 1
  12. Sift the semolina in a second very large bowl and set aside any lumps that you cannot breakdown.
  13. Couscousier Inside
  14. Steam Couscous
  15. Place the mixture in the top of the couscousier and steam for 30 minutes over medium heat.
  16. Steamed Couscous
  17. Pour into a very large bowl and let cool. Then add 4 cups of water, stir in with a wooden spoon and let the mixture rest until all of the water has been absorbed. Sift again, removing any lumps and steam for an additional 30 minutes on medium heat. Pour into a large bowl and let cool.
  18. Fine Consistency
  19. Sift the mixture and place in plastic containers or use right away. You can keep the couscous in the freezer for a couple of months or in the refrigerator for three or four days.

Happy 2008!

The previous year was a whirlwind for me. It was a year of a couple of firsts, one was celebrating the first anniversary of my first and hopefully only marriage. Second, was writing my first blog. I have really enjoyed sharing new cooking and travelling adventures with all of you and don’t worry, there is much more to come.

I wish all of you a happy and healthy 2008. May all of your wishes come true.

New Year’s Eve is not widely celebrated here in Israel because in Judaism, the new year is Rosh Hashana, which normally falls in September or the beginning of October, depending on the Jewish Calendar. We went to a friend’s house for dinner, but did not say celebrate the new year, it was just a dinner with friend’s. We feasted on entrecote, lamb chops, lentils, zucchini, salad, homemade tomato bread, roasted potatoes and plenty of champagne.

To close the meal, I made Tarte au Citron. I know some of you will shriek that I made a parve version of this tarte, but it was as delicious as when I make it with butter. I know that sounds crazy, but it is true. This recipe is from chef Thomas Keller of French Laundry, Bouchon and Per Se restaurants in the United States. The crust is made with pinenuts, but you could easily make it with a plain tart crust of your choice. Just make sure that the tart crust does not contain a lot of sugar. The lemon filling is lemony and very creamy because you make it using sabayon method, which means that you rapidly whisk the mixture over a bain marie until it is thick and creamy.

Tarte au Citron
Recipe from Bouchon by Thomas Keller
Ingredients
  • 1/3 recipe Pine Nut Pastry Dough see accompanying recipe
  • 2 eggs cold
  • 2 egg yolks cold
  • 3/4 cup granulated sugar
  • 1/2 cup fresh lemon juice
  • 85 g 6 tablespoons cold unsalted butter or margarine, cut into 6 pieces
Instructions
  1. Preheat the oven to 180C (350F) degrees. Generously butter and flour a 9-inch fluted tart pan with a removable bottom and refrigerate it while the oven preheats.
  2. Remove the tart pan from the refrigerator. Use your fingertips to press the chilled pine nut dough evenly over the bottom and up the sides of the pan. Trim off any excess dough.
  3. Bake the crust for 10 to 15 minutes, then rotate it and bake for another 10 to 15 minutes, or until it is golden brown. Remove the crust from the oven and let it cool while you make the filling. (There may be some cracks in the crust; they will not affect the finished tart.)
  4. Bring about 1-1/2 inches of water to a boil in a pot that is slightly smaller than the diameter of the bowl you will be using for the filling. (The bottom of the bowl should not touch the water.)
  5. Meanwhile, in a large metal bowl, whisk the eggs, yolks and sugar for about 1 minute, or until the mixture is smooth. Set the bowl over the pot and, using a large whisk, whip the mixture while you turn the bowl (for even heating). After about 2 minutes, when the eggs are foamy and have thickened, add one-third of the lemon juice. Continue to whisk vigorously and, when the mixture thickens again, add another one-third of the lemon juice. Whisk until the mixture thickens again, then add the remaining lemon juice. Continue whisking vigorously, still turning the bowl, until the mixture is thickened and light in color and the whisk leaves a trail in the bottom of the bowl. The total cooking time should be 8 to 10 minutes.
  6. Turn off the heat and leave the bowl over the water. Whisk in the butter a piece at a time. The filling may loosen slightly, but it will thicken and set as it cools. Pour the warm filling into the tart crust and place the pan on a baking sheet.
  7. Preheat the broiler. While the filling is still warm, place the tart under the broiler. Leaving the oven door open, brown the top of the filling, rotating the tart if necessary for even color; this will take only a few seconds, so do not leave the oven. Remove the tart from the broiler and let it sit for at least 1 hour before serving. Serve at room temperature or cold.


Pine Nut Crust
Recipe from Bouchon by Thomas Keller Because this dough uses only one egg, it is difficult to make in a smaller quantity. You will use one-third of this recipe to make the Lemon Tart; freeze the extra dough for another time.
Ingredients
  • 2 cups pine nuts 283g or 10 ounces
  • 1/3 cup granulated sugar
  • 3 cups all-purpose flour
  • 226 g 1 cup unsalted butter or margarine, at room temperature (2 sticks)
  • 1 egg
  • 1 teaspoon vanilla
Instructions
  1. Place the pine nuts in a food processor and pulse a few times. Add the sugar and flour and continue to pulse until the nuts are finely ground. Transfer the mixture to a large bowl.
  2. Add the butter, egg and vanilla and mix to incorporate all the ingredients (the dough can be mixed by hand or in a mixer fitted with the paddle attachment). Divide the dough into 3 equal parts. Wrap each piece in plastic wrap and refrigerate for at least 10 minutes before using. The extra dough can be frozen, wrapped well, for up to 1 month.

Baking for Mama – May She Rest in Peace 1912-2007

My 95-year-old Grandmother passed away Saturday 29 December in the USA, which had me thinking of all of the wonderful times we had cooking together. I owe a lot of my cooking skills to her. She encouraged me to take cooking lessons and taught me how to make all of the family holiday recipes. During December, we always baked all of the special goodies for family near and far. Family would always come to visit during the Christmas vacation, and even though we did not celebrate Christmas, we always had special goodies around, such as her chocolate cake, 1-2-3-4 cake, her amazing butter cookies, Rose’s apricot tarts, and her schnecken. But the baked goods that she always looked forward to was the big package of German goodies that family friends in Germany sent my grandparents. The package came from the famous Lebkuchen Schmidt bakery in Nürnberg. She would open the package and take a deep whiff, and then delicately open the packages. We would stand there in excitement smelling the spicey goodness and salivating, waiting to take a bite of the lovely Elisen lebkuchen and speculaas cookies. You could smell the cardamom, cinnamon, clove and nutmeg all over the house.

I usually buy lebkuchen when I am in Germany, but this year I was unable to make a trip there before Christmas, so I decided to do the impossible and try to make some myself. I knew that they would not be as good as Lebkuchen Schmidt, who have been making these amazing biscuits since 1927. My first attempt resulted in overbaked biscuits because I had spread the dough too thin on the oblaten wafer. However, the second time round I managed to get it right and even my famously critical other half drooled every time he came close to one. I decided to leave my lebkuchen natural and used square oblaten instead of round. If you cannot find oblaten wafers, which are similar to communion wafers, then use rice paper.

I couldn’t find candied orange, so I made it myself using thick-skinned navel oranges.


Nürnberger Elisenlebkuchen
Servings: 75 pieces of five centimeter (2 inches) diameter
Ingredients
  • 470 g 2-1/3 cups sugar
  • 4 eggs
  • 1 teaspoon of vanilla sugar
  • 400 g 14 ounces hazelnuts (one-half milled rough and the other fine)
  • 80 g 3 ounces whole almonds, finely chopped
  • 50 g 1.7 ounces roughly chopped walnuts
  • 100 g 3.5 ounces of finely cut candied orange and lemon peel respectively
  • Freshly grated untreated orange and lemon peel
  • 1 teaspoon of finely chopped ginger root in syrup
  • 1 teaspoon of the following milled spices: cinnamon cloves, allspice, coriander, mace, cardamom, nutmeg
  • <a href="http://www.flickr.com/photos/baronesstapuzina/2145105476/" title="Oblaten Package by BaronessTapuzina on Flickr">Oblaten Package
  • 2 packets of oblaten wafers 5 cm (2 inches diameter)
Punch Icing
  • 130 g 1 cup icing sugar, sifted
  • 2 teaspoon of rum
  • 2 teaspoons of red wine
Chocolate Icing
  • 20 g .7 ounces of bittersweet chocolate (preferably 70%; high quality)
For decoration:
  • A selection of nuts and candied fruit
Instructions
  1. Use the egg whisk attachment of an electric beater to beat sugar, eggs and vanilla sugar so that the foamed mass has doubled and the sugar is dissolved.
  2. Ground Hazelnuts and Almonds
  3. Candied Orange Lemon and Ginger
  4. Then add the nuts, candied and fresh orange and lemon peel, ginger and spices. Cover the batter and leave it in a cool place for 24 hours.
  5. Oblaten Sheets
  6. Unbaked Lebkuchen
  7. The next day form small, approx. 15 g (1 rounded tablespoon), balls from the mix with wet hands and place each on a wafer so that a 3 to 5 mm broad margin remains. Place the wafers on a baking paper lined baking tray and bake until light brown for 10 to 12 minutes at 200C (400F) in a preheated oven.
  8. The Lebkuchen should be well risen but not quite finished inside because they have to further develop and remain soft inside. The finished Lebkuchen should be slid onto a drying rack to cool. Place one-third of the cookies to the side: they should remain natural, e.g. without icing.
For the punch icing:
  1. Mix the sifted icing sugar and to a smooth consistency with rum and red wine. Then dip the upper surface of a further third of the Lebkuchen (not the wafer side) into this icing.
For the chocolate icing:
  1. Melt and temper the chocolate, and then dip the upper surface of the remaining Lebkuchen. Leave the iced Lebkuchen on a drying rack to dry.
  2. Decorate the lebkuchen with nuts and candied fruit while the icing or natural cookie is still soft.
  3. Store the completed Lebkuchen in an airtight tin. Cover the cakes with greaseproof paper and lay a few apple peelings on top. This keeps them soft and moist. Try to let the cookies mature for about ten days before serving them.

Chestnut Heaven

One of the things that I really like about winter is chestnut season.

I remember fondly when my grandmother would splurge and buy chestnuts every december. They were quite expensive when I was a child, but the house smelled so nice when she was roasting them in the oven. My first experience of eating fire roasted chestnuts was not until I lived in Europe. I couldn’t wait to see the vendors rolling their carts yelling “Roasted Chestnuts” in German, Italian or French. I loved biting into their floury goodness and now I enjoy finding recipes in which they can be used to accent a dish.

I had some goulash meat in the freezer that needed to be cooked and I started looking at recipes I hadn’t made yet. And since winter has begun here in Israel, and I had just bought a big bag of chestnuts, I started craving a hearty winter dish. I found an amazing recipe bursting with flavour. I am not sure where this dish originates from, but I know that it is from somewhere in the Caucasus. The spices, the walnuts, the pomegranate juice impart an amazing, dare I say orgasmic flavour to the dish and the house smelled like a spice market. I highly recommend this recipe and I will definitely make it again and again.

I didn’t have any sour apricots on hand, so I used dried sour cherries, but they were lost in the dish. I served it over a brown rice.

Beef Stew with Chestnuts and Pomegranate
Ingredients
  • 455 g 1 lb chestnuts roasted and shelled
  • 2 medium onions
  • 1/4 cup canola oil
  • 800 g 1-3/4 lbs goulash or stew beef, cut into 1/2-inch cubes ( I used frozen goulash meat that I thawed out)
  • 1/4 teaspoon turmeric ground
  • 1/4 teaspoon saffron threads crushed
  • 1/2 teaspoon cinnamon ground
  • 1 cup walnuts minced fine
  • 1/4 - 1/2 cup of sour apricots cut into quarters
  • 1 cup pomegranate juice
  • 2 tablespoon tomato paste
  • 3 tablespoon lemon juice freshly squeezed
  • 1-1/2 cups chicken stock
  • 1 teaspoon honey or date honey
  • 1 teaspoon salt
  • 1 garlic clove minced fine
  • 1 teaspoon black pepper
  • 1/4 cup fresh parsley as garnish optional
Instructions
  1. Heat the oil in a heavy casserole over medium heat. Saute the onions and garlic for 10 minutes. Raise the heat to high, add the meat, turmeric, salt, pepper, and brown meat on all sides. Stir in the saffron, cinnamon, walnuts, sour apricots, tomato paste, and chicken stock. Bring to a boil, reduce heat to low, cover, and simmer for 1-1/2 hours.
  2. Note: Depending on the cut of meat, you may need to cook this for 2 hours. Just make sure you check it half way through because you may need to add a little more liquid.
  3. Add the lemon juice, pomegranate juice, and chestnuts. Stir well, cover and simmer for 10 more minutes. Serve over a bed of saffron rice.

Spanish and Indian-Inspired Hannukah

I really like finding interesting recipes that may not be holiday-specific, but fit in with the types of foods that are typically served for the holiday. And I like to mix cultures in a meal. I think it makes the meal more interesting. So, for this meal I decided to serve a Spanish potato fritter which is also made in Italy, and an Argentinian cut of meat with Indian spices. I just love global cooking!

Try it some time, instead of having a themed dinner party where the entire menu is from one country or region, try making the menu diverse by making a Swedish appetizer, Middle Eastern main dish, Thai side dish and a Brazilian dessert.

I decided to make another variation of the Ashkenazi potato latkes and make something a little more Sephardi, so I made potato and sage fritters. These are quite light and are perfect for a hot appetizer. They are very easy to make and can be made a few hours ahead of time and reheated in the oven. The recipe only called for one tablespoon of sage. I like a nice sage flavour, so I added two tablespoons. I probably could have added more. The lemon is rather pronounced, so if you don’t like a strong lemon flavour, you could put in only one teaspoon of lemon zest.

Potato and Sage Fritters
Servings: 40 fritters
Ingredients
For the sponge:
  • 1/4 cup warm water
  • 2 tablespoons all-purpose flour
  • 1/2 envelope 1-1/8 teaspoon active dry yeast
For the fritters:
  • 450 g 1lb pound russet potatoes, peeled and cut into 1-inch cubes
  • Cold water
  • 1 tablespoon plus 2 teaspoons sea salt
  • 2 large eggs
  • 1/2 cup extra-virgin olive oil
  • 2 cups all-purpose flour
  • 1 tablespoon finely chopped fresh sage leaves
  • 2 teaspoons freshly grated lemon zest
  • 1/2 teaspoon coarsely ground black pepper
  • 4 to 6 cups peanut oil for deep-frying
Instructions
To make the sponge:
  1. In a small bowl, combine the water, flour and yeast. Mix well and set aside in a warm place until yeasty-smelling and covered in very small bubbles, about 45 minutes.
  2. In a medium saucepan, cover the potatoes with cold water. Bring the water to a boil over high heat, add 1 tablespoon of sea salt. Reduce the heat to a simmer, and cook until the potatoes are tender, 20 to 25 minutes. Drain and mash the potatoes with a fork. Allow them to cool.
  3. Potato and Sage Fritters
  4. In a small bowl, whisk together the eggs and olive oil until thoroughly combined. In a bowl, combine cooled potatoes with the sponge, flour, sage, lemon zest, pepper, and 2 teaspoons of salt. Mix to evenly distribute the ingredients. Add the egg mixture to potato mixture, and stir until thoroughly combined. Use a rubber spatula to scrape down the sides of the bowl. You should have a thick, sticky batter. Add a bit more flour, if needed. Cover the bowl with a towel and set aside in a warm place to rise until doubled in size, for 1 1/2 to 2 hours.
  5. Heat the oil in a deep-fryer or heavy pot to 190C (375F).
  6. Potato and Sage Fritter Batter Risen
  7. Scoop 1 tablespoon of the risen batter at a time, and use another spoon to scrape it into the hot oil. Don't crowd the fryer. Fry fritters until golden brown, 2 to 3 minutes, turning them over occasionally. Drain the fritters on paper towels to absorb any excess oil. Sprinkle with salt and serve warm.

We got a great deal on Argentinian asado, or short ribs as they are called in the States. The best part was that they had relatively little fat on them. Slow cooking is a must for this cut of meat, so when I saw this recipe and it didn’t call for slow roasting, I was a bit skeptical. I didn’t have time to marinate them for three days, so maybe that makes the difference. I marinated the ribs for a full 24 hours and then slow roasted (roasting pan, 2 cups of water, covered with foil) them in the oven at 150C (300F) for 1-1/2 hours and then grilled them. They were outstanding and I can only imagine what they would be like if I had marinated them for three days.

We actually had a problem with this recipe because the way the asado is cut here in Israel, the pieces of bone (rib) embedded in the meat are almost three inches long, which means that the thickness of the meat is considerably greater than in the States. This means that you can’t expect to cook it through with just a few minutes on the grill, however hot. In a typical South American grill in Israel (we have quite a few of them just up the road in Kfar Saba, where there is a big Argentinian immigrant community), the asado is often slow grilled for more than an hour on a vertical stand placed a few inches from the fire, which brings out the full flavour in this rather fatty cut of meat.

This marinade is also great on chicken. You can put it directly on the chicken and cook it straight away if you want.

Indian-Style Grilled Short Ribs
Recipe from Chef Floyd Cardoz
Servings: 4
Ingredients
  • 6 garlic cloves coarsely chopped
  • 2 tablespoons finely chopped fresh ginger
  • 1/4 cup dry red wine
  • 3 tablespoons red wine vinegar
  • 3 tablespoons pure maple syrup or honey or date honey
  • 3 tablespoons vegetable oil
  • 3 tablespoons tomato paste
  • 1 tablespoon rosemary leaves
  • 1 tablespoon kosher salt
  • 2 teaspoons thyme
  • 1 1/2 teaspoons freshly ground black pepper
  • 1 teaspoon ground coriander
  • 1/2 teaspoon ground allspice
  • 1/2 teaspoon sweet paprika
  • 1/4 teaspoon ground ginger
  • 1/4 teaspoon ground cloves
  • 1/4 teaspoon cayenne pepper
  • 8 beef short ribs on the bone about 450g (1lb each), trimmed of excess fat
Instructions
  1. In a blender, combine the garlic, ginger and red wine and puree. Scrape the wine puree into a medium bowl and stir in all of the remaining ingredients except the short ribs. Pour the marinade into 2 resealable plastic bags and add the short ribs. Tightly seal the plastic bags and refrigerate the short ribs in the marinade for 3 days.
  2. Indian-style short ribs
  3. Light a grill. Remove the short ribs from the marinade, scraping off any excess. Grill the short ribs over moderately high heat until they are lightly charred and medium-rare, about 5 minutes per side.

Healthier Hannukah

As most of you know, the holiday of Hannukah is all about oil. So, the foods that we eat during this time are fried and oily. This year we decided that we wanted to try and have a more healthier Hannukah. We did have potato pancakes, but I thought we should try a lower carbohydrate latke that wouldn’t make us feel like we were missing out on having yummy carbohydrate-laden potato latkes.

I decided to make cauliflower latkes. Okay, you don’t quite get the crunch of a regular potato latke, but they were very good. They certainly tasted like potato latkes because I put most of the same ingredients that I put in the potato version. My husband gives them a high rating and so do I.

Cauliflower Latkes
Servings: 20 latkes
Ingredients
  • 1 about 1kg or 2 pounds large cauliflower, trimmed and chopped into 1-inch pieces
  • 1 medium onion finely chopped
  • 2 tablespoons vegetable oil
  • 1/2 cup seasoned bread crumbs or whole wheat breadcrumbs
  • 1 teaspoon fresh or 1/4 teaspoon dry thyme
  • 2 tablespoons minced fresh parsley
  • 2 green onions sliced, including the green part
  • 2 large eggs lightly beaten
  • Salt to taste
  • Freshly ground pepper to taste
  • 4 Tablespoons vegetable oil for frying
Instructions
  1. Steam the cauliflower until tender, but not mushy. Mash to the consistency of mashed potatoes with 1/4-inch lumps. Drain any excess moisture.
  2. Meanwhile, gently saute onions in vegetable oil over medium-low heat until soft and lightly browned, about 10 minutes. Remove from heat and let cool about 5 minutes.
  3. Combine the mashed cauliflower, sauteed onions, bread crumbs, thyme, parsley, green onion, eggs, salt, and pepper with a wooden spoon.
  4. Heat about 4 tablespoons of oil in a deep skillet.
  5. Scoop out a heaping tablespoon of the cauliflower mixture into your hands and compress into a patty about 1/2-inch thick. Place patty in hot oil to fry. Repeat with remaining cauliflower, cooking 4 to 5 patties at a time, flipping when golden on the first side. Do not crowd pan or they will not brown and crisp properly. Drain cauliflower latkes on paper towels and keep warm in the oven at 250 F. until all are completed.

Italian Hannukah

The first night of Hannukah we were invited to a friend’s house to celebrate with their family. We had a nice meal of mushroom soup, potato latkes, butternut squash and curry latkes, salad, homemade Merlot wine and peapod wine. It was a delicious dinner.

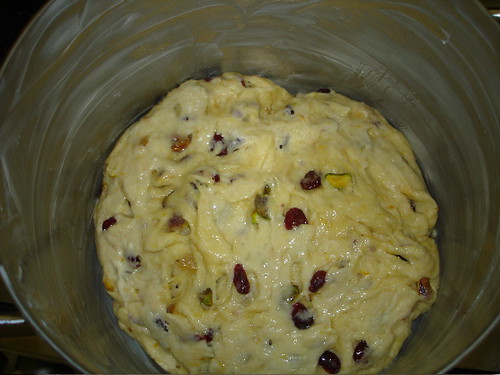
I volunteered to bring dessert and instead of bringing soufganyiot, I decided to make an Italian holiday dessert, Panettone in honor of my Italian ancestry. A couple of years ago, I found an interesting take on this sweet bread which is usually made with raisins and candied fruit. The one I made is called Cranberry Pistachio Panettone. It is an eggy, buttery sweet bread, but not too sweet. I like it better than the panettone I used to buy in Milano and Lugano. It is really easy to make, just a little time consuming because of the rising time, but well worth the wait. You can freeze it, just make sure you wrap it well.

I baked it in a tall, narrow cooking pot that I use to cook pasta or asparagus. If you can find a paper panettone form, then use that. I could find one in any of the baking shops. You can also be decadent and make this with dried tart cherries instead of cranberries.